


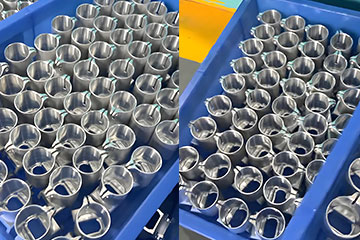
Most teams new to 3D printed copper parts fixate on the printing process itself — and completely sleep on post-processing.
They send over a design, get a printed part back, and wonder why thermal conductivity is lower than expected, channels are clogged with powder, or the part warps when they machine the mounting surface.
Printing is only half the battle. How you post-process your copper part directly determines its real-world thermal performance, pressure rating, dimensional accuracy, and service life. Cut corners here, and even the best-optimized cooling design will fall flat.
On this page, we’ll break down the standard post-processing processes we use for production-grade copper thermal parts, what each one actually does, and where you need (and don’t need) premium options like HIP. This is part of our full lineup of 3D printed copper & copper alloy thermal management solutions, so you can see how post-processing fits into your overall build.
Why Post-Processing Makes Or Breaks Your Cooling Part
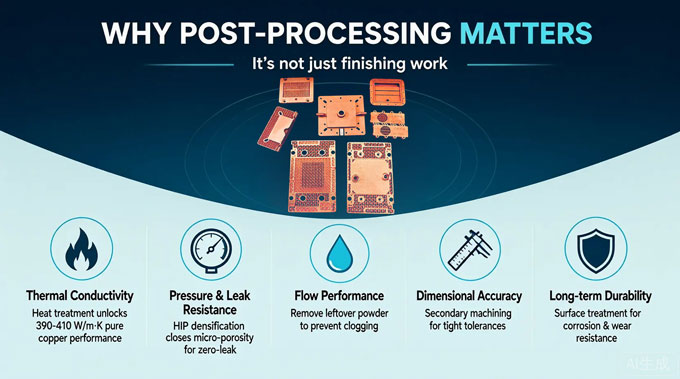
This isn’t just “finishing work.” For thermal components, post-processing directly impacts the specs that matter most:
- Thermal conductivity: As-printed copper doesn’t hit its full conductivity potential out of the machine. A proper heat treatment cycle is required to unlock the 390–410 W/m·K performance you expect from pure copper.
- Pressure & leak resistance: Internal micro-porosity from printing can cause slow leaks in high-pressure liquid cooling loops. Densification processes like HIP close those voids for zero-leak reliability.
- Flow performance: Leftover powder in microchannels or lattice structures doesn’t just reduce surface area — it can throw off pressure drop and even clog your cooling loop over time.
- Dimensional accuracy: As-printed surfaces are accurate enough for many uses, but mating surfaces and threaded ports need secondary machining to hit tight tolerances and minimize thermal interface resistance.
- Long-term durability: Corrosion resistance, rezistență la uzură, and EMI shielding all depend on the right surface treatment for your operating environment.
Standard Post-Processing Processes (What Each Actually Does)
These are the real-world processes we use for production thermal parts. No lab-only gimmicks, no marketing fluff — just what actually gets used on the shop floor.
Stress Relief Heat Treatment
Printing copper creates internal residual stress as layers melt and cool at different rates. Skip stress relief, and your part can warp, twist, or even crack during machining or thermal cycling.
We run a low-temperature stress relief cycle on every copper part as a standard step, right after printing. It adds almost no cost, prevents most deformation issues downstream, and is non-negotiable for any part that will see secondary machining.
Conductivity Optimization Heat Treatment
This is the single most important step for thermal performance.
As-printed pure copper has decent conductivity, but it’s nowhere near its full potential. A properly tuned heat treatment cycle recrystallizes the material structure and pushes thermal conductivity to 390–410 W/m·K — matching standard wrought C11000 copper bar stock.
Skip this step, and you’re leaving 20%+ of cooling performance on the table. We include this as standard on all pure copper thermal parts, no extra charge.
Presare izostatică la cald (HIP)
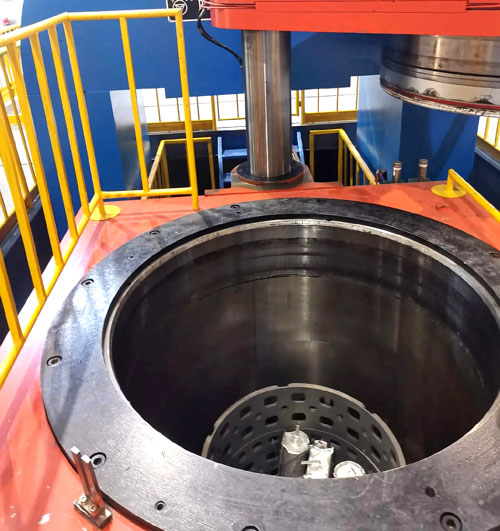
HIP uses high pressure and high temperature to collapse internal micro-pores and voids in the printed part, pushing density to nearly 100%.
For low-pressure, static cooling parts, standard as-printed density (>99%) is perfectly fine, and HIP is overkill. For high-pressure liquid cold plates and mission-critical parts, HIP is worth every penny: it eliminates leak paths, improves fatigue resistance, and even gives a small boost to thermal conductivity by removing internal voids.
If you’re building cold plates for high-pressure AI server loops or automotive power electronics, we almost always recommend HIP. For standard parts, you can skip it and save cost.
→ Learn more about high-pressure builds in our guide to 3D printed copper liquid cold plates for server cooling.
Powder Removal & Internal Channel Cleaning
This is the step that gets overlooked most often — and causes the most headaches down the line.
Microchannels, structuri reticulare, and complex flow paths trap loose powder during printing. If you don’t clean it out thoroughly, that powder can break loose during operation, clog filters, or build up in narrow channels and spike pressure drop.
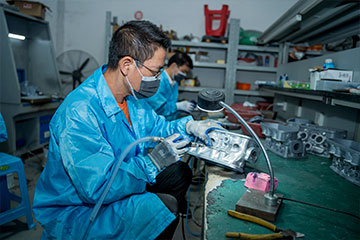
We use a combination of forced air flushing, ultrasonic cleaning, and flow testing to clear all internal cavities on every cooling part. For dense lattice designs, we also plan dedicated powder access ports during the DFM stage to make sure every corner gets cleaned. We cover design rules for easy powder clearance in our full design guide for 3D printed copper heat exchangers.
Finisarea suprafețelor
External surfaces
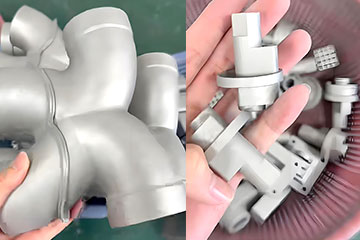
We offer standard bead blasting for a uniform, matte finish on external surfaces. For parts needing a smoother appearance or tighter dimensional tolerances, we can do grinding and polishing as needed.
Internal flow channels
Here’s the big myth everyone gets wrong: smoother channels are not always better. As-printed channel walls have a slight controlled roughness that disrupts the laminar fluid boundary layer and actively boosts heat transfer. For most liquid cooling designs, a standard cleaned but unpolished channel delivers better thermal performance than a highly polished one — at lower cost.
We only recommend internal fluid polishing if you have extremely strict pressure drop requirements and are willing to trade a small amount of heat transfer for lower flow resistance.
CNC Machining of Mating Surfaces
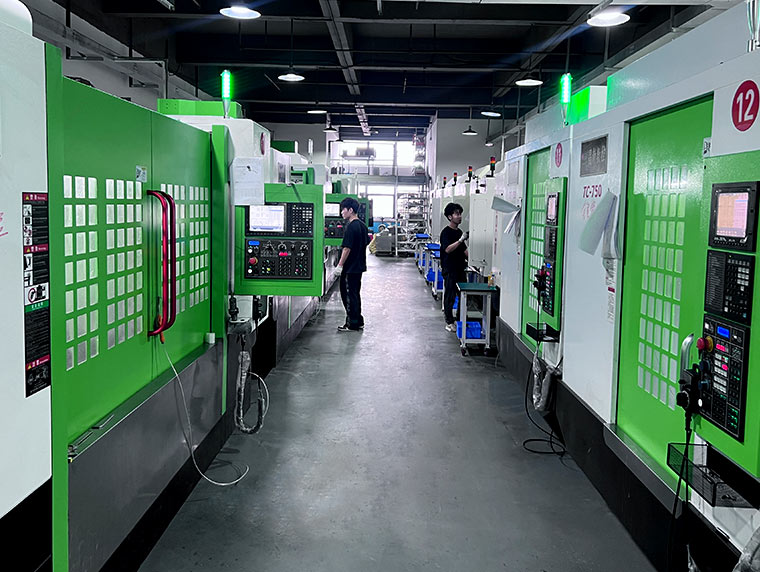
As-printed flat surfaces are smooth, but they’re not flat enough for minimal thermal interface resistance.
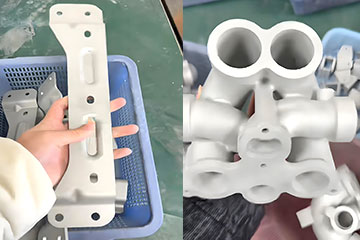
We always recommend leaving a small amount of stock on mounting and sealing surfaces, then finish-milling them flat after heat treatment. This ensures perfect contact with your component, no gaps, and the lowest possible thermal resistance at the interface.
We also do all secondary tapping and threading operations after printing. For pure copper parts, we almost always tap threads post-print instead of printing them directly, since the softer material can deform or strip easily. For copper alloys like CuCrZr, printed threads work fine for most low-torque applications.
Plating & Protective Coatings
For parts operating in harsh environments, we offer a range of secondary coatings:
- Electroless nickel plating: Boosts corrosion resistance and wear resistance for industrial and outdoor applications.
- EMI shielding coatings: For high-speed optical modules and sensitive electronics packages.
- Anti-tarnish treatments: Prevents copper oxidation for cleanroom and telecom environments.
Pure Copper vs Copper Alloy: Post-Processing Differences
Material choice doesn’t just change printability and thermal performance — it changes how we approach post-processing too.
Pure copper relies most heavily on heat treatment to unlock maximum thermal conductivity. Since it’s softer, we almost always do secondary machining and tapping instead of printing threads directly. Standard stress relief and conductivity heat treatment are included as baseline steps.
Copper alloys like CuCrZr use heat treatment primarily to boost strength and hardness, not just conductivity. The material is hard enough to support as-printed threads and fine features with less risk of damage. HIP is still available for high-pressure builds, but many industrial designs don’t require it thanks to the alloy’s inherent density and strength.
We break down full material tradeoffs in our pure copper vs copper alloy 3D printing comparison guide, including how post-processing impacts total cost.
Mărturii ale clienților B2B din străinătate

“Eram foarte îngrijorat că s-ar putea întâmpla ceva rău. Dar după ce ați primit produsul, Am constatat că îngrijorarea mea era total nejustificată. DT 3D Printing este o fabrică foarte fiabilă, cu calitate garantată.”


“Calitatea produsului este de top – notch, măiestria este excepțională, efectul de tipărire este excelent, iar viteza de livrare este foarte mare. În ansamblu, oferă un raport calitate-preț excelent, și sunt extrem de mulțumit.”


“Calitatea tipăririi este cu adevărat excelentă, iar prețul este destul de accesibil. Viteza serviciilor logistice este, de asemenea, rapidă. În concluzie, DT este o fabrică de încredere, și vom continua să colaborăm cu ei pe termen lung.”



The Most Common Post-Processing Mistakes We See
We review dozens of copper cooling projects every month, and the same missteps pop up over and over. None are fatal, but they’ll cost you time and money if you don’t plan for them upfront.
Skipping stress relief before machining
We see this all the time: teams want to save time, so they send a raw printed part straight to the machine shop. Halfway through milling the mounting surface, the part warps. Always run stress relief first — it’s cheap, fast, and prevents 90% of deformation issues.
Assuming you need HIP for everything
HIP is great for high-pressure parts, but it adds cost and lead time. For low-power, static heat sinks and low-pressure cooling parts, standard >99% density is more than reliable enough. Don’t pay for a premium process you don’t actually need.
Over-polishing internal channels
As we covered earlier, slightly rough internal walls improve heat transfer by promoting turbulent flow. Polishing channels to a mirror finish will lower pressure drop, but it will also reduce cooling performance — and cost you more. Only do it if you have a hard pressure drop requirement you can’t hit any other way.
Designing without powder removal in mind
Text lung, dead-end channels and fully enclosed lattice cavities are impossible to clean properly. Always plan for powder access in your initial design, or you’ll end up with a part that looks great on the outside but has clogged, underperforming internals.
Întrebări frecvente
Does post-processing add a lot of lead time?
Standard stress relief, conductivity heat treatment, powder cleaning, and bead blasting are all included in our standard 10–15 business day prototype lead time. Premium processes like HIP add 3–5 business days. We’ll always be upfront about lead time impact in your quote.
Do all copper cooling parts need HIP?
Nu. For low-pressure static applications, standard as-printed density (>99%) is more than sufficient. HIP is only necessary for high-pressure liquid cooling loops, mission-critical parts, or applications where zero internal porosity is required.
How much dimensional change happens during heat treatment?
Very little — well under 1% for properly oriented parts. We factor this shrinkage in during DFM review so your finished, post-processed parts land within your specified tolerance range.
Can you plate 3D printed copper parts for corrosion resistance?
Da. We offer electroless nickel plating and other protective coatings for outdoor, industrial, and marine environments. We’ll recommend the right coating based on your operating conditions and performance requirements.
Can you match the surface finish of a machined copper part?
For external mating surfaces, yes — we can finish-machine to the same flatness and roughness as a conventionally milled part. For non-critical external surfaces, bead blasted finish is the standard and most cost-effective option.
Ready To Get Clear On What Post-Processing Your Part Actually Needs?
Don’t guess and end up paying for processes you don’t need, or skipping steps that kill your part’s performance.
Send us your CAD file, thermal specs, and operating conditions, and our engineering team will get back to you with:
- A full DFM (Design for Manufacturing) review
- A clear recommendation on exactly which post-processing steps you need (and which you don’t)
- Expected thermal performance and pressure rating estimates
- Firm pricing and lead time
No generic sales pitches, just straight engineering feedback from people who print and post-process copper thermal parts every single day.
Request your free design review today and make sure your part performs as expected right out of the gate.


Despre noi
1. We are a professional metal 3D printing manufacturer.
2. Realizăm imprimarea 3D a pieselor metalice pentru industria auto, medical, aeronavă, aerospațial, dronă, și industria navală, utilizând materiale precum oțelul inoxidabil, titan, cupru, aluminiul și tipurile de aliaje.
3. Oferim servicii complete de imprimare 3D.
Serviciile noastre includ:
SLM / BJ / SLA / MJF / FDM / SLS / DLP, CNC machining and post-processing
4. Noi deținem 33 Imprimante 3D metalice SLM, 14 CNC machining tools, 60 imprimante 3D din plastic, 50 BJ 3D printers (owned by another company in which DT has invested), iar cifrele continuă să crească.
5. We are a source factory for many global 3D printing service providers.
De ce să ne alegeți?
- We have helped customers design and manufacture numerous pure copper and copper alloy thermal management components with SLM 3D printing using copper and copper alloys for clients all over the world.
- We provide in-house manufacturing cu 33 high-end industrial SLM metal 3D printers, 14 CNC machines and 50 industrial BJ 3D printers (Owned by another factory in which we have an investment).
- Special Offer for New Clients
- Our strength lies in SLM metal printing. Noi deținem 33 premium SLM metal 3D printers, most costing around $150,000 fiecare, and our fleet is still expanding.
- No MOQ (Cantitatea minimă de comandă) required. We can customize even a single piece for you.
Feel free to contact us for inquiries.
Nu există o cantitate minimă de comandă (MOQ) (Cantitatea minimă de comandă) limită aici. Putem personaliza chiar și un singur text pentru dumneavoastră.
Vă invităm să ne contactați.